Microsoft Office Outlook Setup for New Qwestoffice.net Accounts
Open up Microsoft Office Outlook:
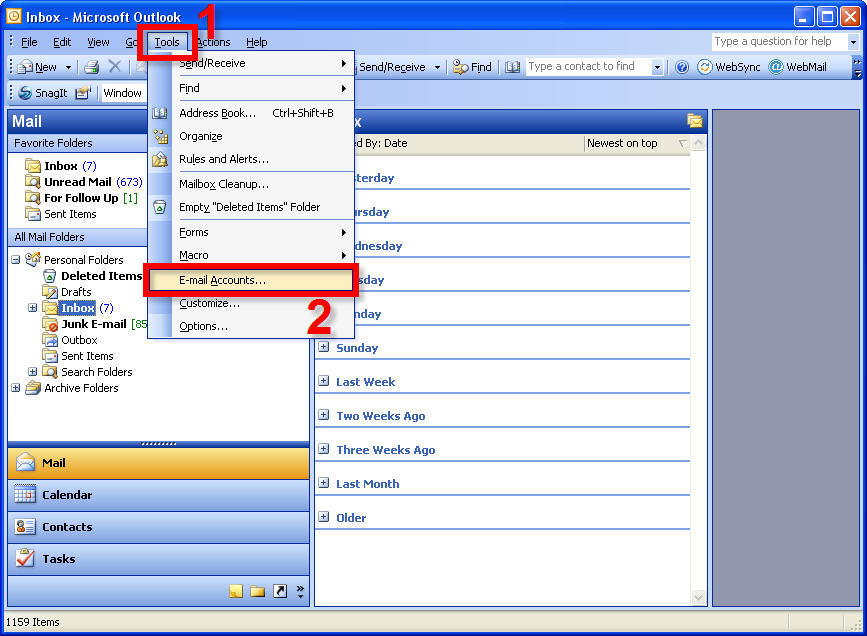
1. Select ‘Tools’.
2. Select ‘Email Accounts’ (If you do not see the option ‘Email Accounts’, click on the arrow pointing downwards at the bottom of the drop down menu to expand and show any hidden selections.).
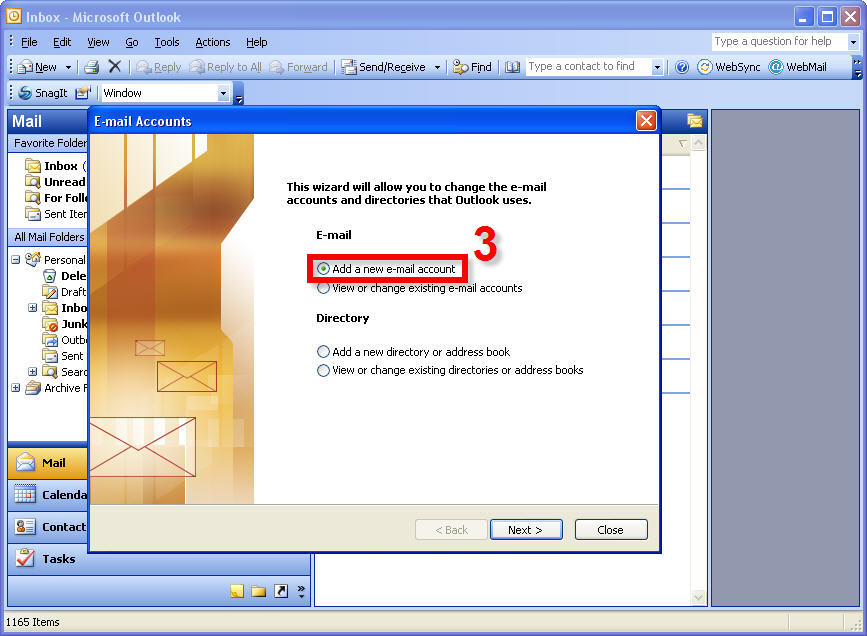
3. On the Email Accounts screen that pops up, select ‘Add a New Email Account’ located under the email heading.
Then click the ‘Next’ button at the bottom of that screen to proceed.
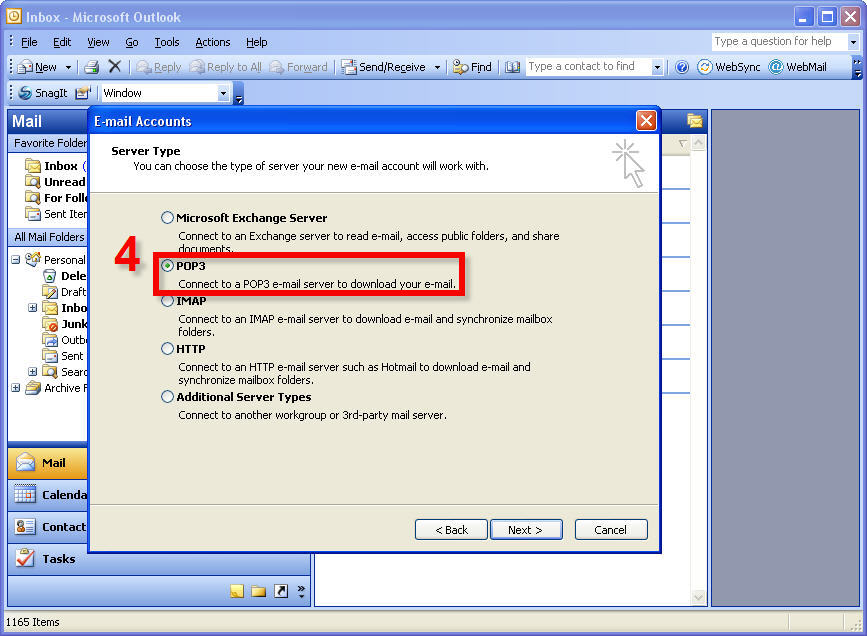
4. On the 'Server Type' screen that appears, click on the radio button next to the bold 'POP3' text. Then proceed by clicking the 'Next>' button at the bottom right hand corner to move to the setup screen.
Note: UPGRADED VANITY DOMAIN accounts (Email addresses ending in your own domain name), please use your own email address in the form of 'username@domain.com' in the email step below (Step 5 ONLY), instead of the 'username@qwestoffice.net' address.
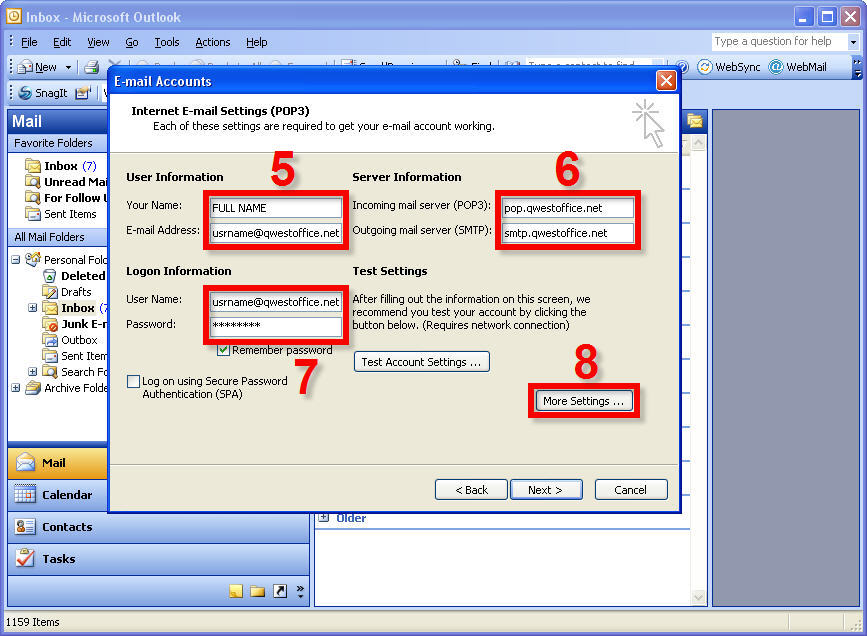
5. Under ‘User Information’:
In the 'Your Name:' field, enter your name or your company's name. This will be displayed on your outgoing emails.
In the 'E-mail address:' field, enter the qwestoffice.net email address you are setting up. This will be your return address that recipients will see.
Also Note: your old @qwest.net email address will be forwarding to your new @qwestoffice.net email for a few months still.
6. Under ‘Server Information’:,
In the ‘Incoming mail server (POP3)’ field type 'pop.qwestoffice.net'
In the ‘Outgoing mail server (SMTP)’ field type in 'smtp.qwestoffice.net'.
7. Under ‘Logon Information’:
In the ‘User Name:’ field type in your full email address of the account you are setting up. That includes the @qwestoffice.net (see below for example).
In the ‘Password:’ field type in the password that was set for that account.
Note: If you are having troubles with the password please login to http://sitecontrol.qwestoffice.com, then scroll to the bottom of the EMAIL section and reset the password.
8. Next, click on the ‘More Settings …’ button.
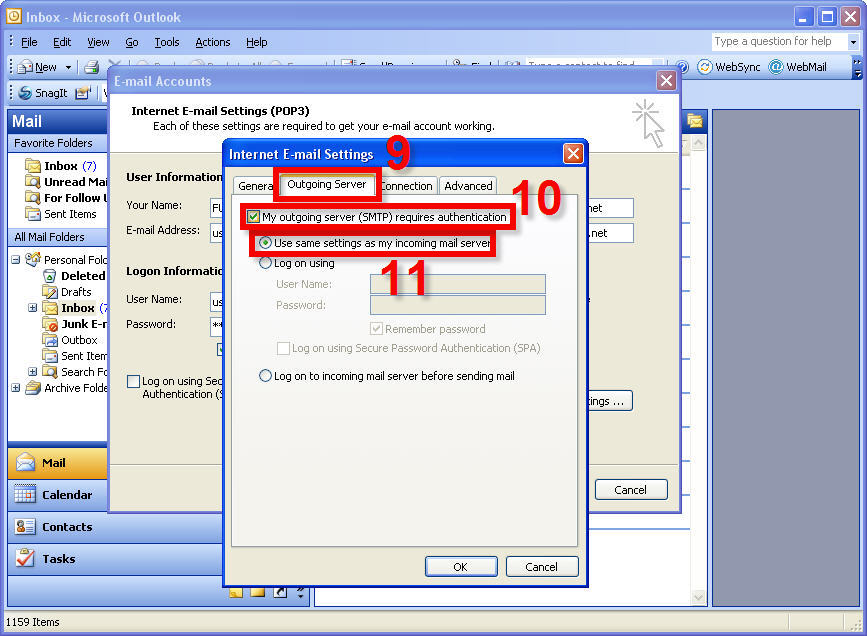
9. When the ‘Internet E-mail Settings’ window appears, click on the ‘Outgoing Server’ Tab
10. Check the option for ‘My outgoing server (SMTP) requires authentication’.
11. Make sure that the option ‘Use same settings as my incoming mail server’ is selected. This will be using the same user name and password for Sending (SMTP) as it does for the Receiving (POP), which you set in step 7.
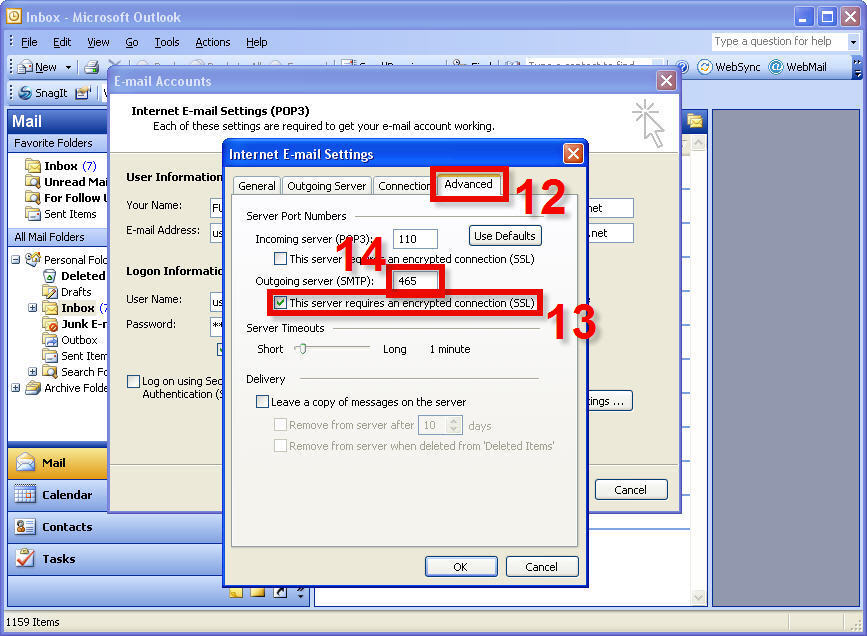
12. Next, select the 'Advanced' tab at the top right hand corner.
13. Under the 'Server Port Numbers' section, select the checkbox 'This server requires a secure connection (SSL)' located directly below 'Outgoing Mail (SMTP):'.
14. Make sure, after you ckecked this option, that the corresponding text box for 'Outgoing Mail (SMTP):' contains the number '465' and NOT '25'. If this is not the case, simply change it. Once this is done, click the 'OK' button to close the window.
15. You will now see the 'POP settings' screen again. Simply close this up by clicking:
The ‘Next’ button in the ‘E-Mail Accounts’ window
Then the ‘Finish’ button to close the the accounts screen.
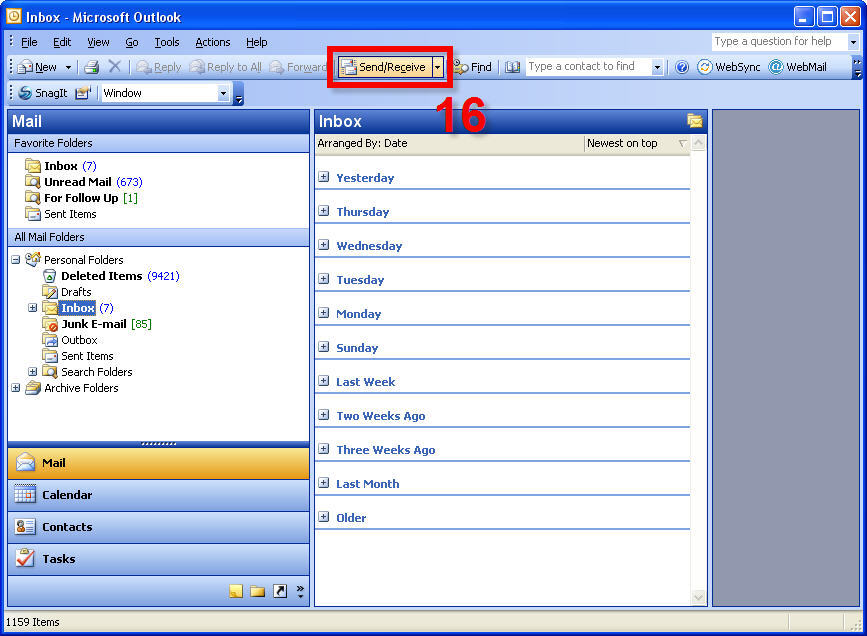
16. Lastly, click the ‘Send/Receive’ button at the top to test the sending and receiving.